Easy Appetizers & Delicious Desserts

I find entertaining difficult, especially with a baby. However, if you preplan a simple menu, most of the work can be done ahead of time with your regular weekly local market visit.

A cheese and cured meats platter with a small dish of olives is an easy appetizer to create. Everyone loves attention to detail. Add flags made with labels and toothpicks for that extra fun touch.

When in season, grab a cantaloupe, cut in small pieces, top with prosciutto for another delicious and easy-to-assemble platter.

Once you get to the dessert portion of the meal, fix cups of teas, coffees, or just pour glasses of milk to accompany a delicious brookie (brownie cookie) or two.

My introduction to baking all started with a recipe from the Clinton Street Baking Co. With each batch I would adapt it to a different craving"The Science Behind Baking Your Ideal Chocolate Chip Cookie" by Anne Miller from the NPR Blog was a real game changer! For a consistent size and round shape, use a small ice cream scooper.

There are several different flavors here with each batch making 12-18 depending on how big you scoop each. The recipe even suggests creating your variety with white chocolate chunks, walnuts, or peanut butter chunks in place of the semisweet chocolate chunks. These can be made a day in advance to take the pressure off of having to prepare a dessert the same day.

To tie the meal together visually, add a few more flags to the brookies labeling the different variations. So what do you think?

*The Clinton Street Baking Co.'s recipe was something I had clipped back in November 2010 from Daily Candy. Oh how I miss Daily Candy!

An Elegant & Minimalist Baby Shower

Co-hosting is a great way to divide and conquer the sheer amount of work behind an event. Recently, a couple of friends and I hosted a baby shower for a wonderful mama-to-be. Her personal style and mantra is all about minimalism, clean lines, and simplicity. We kept her style in the design of the event.

Things came together when we found this gem on Paperless Post:

We secured Sarabeth's Tribeca as the perfect backdrop for brunch. Then the creating began. I am the banner lady* and I pretty much make banners for every event I host. One of my co-hosts made a gorgeous diaper cake while our other co-host brought delicious cupcakes. Both banners and cupcake toppers were made with the handy dandy Silhouette Cameo.

"Yay Baby" Minimalist Baby Shower Party: Banner, diaper cake, and cupcake toppers.

"Yay Baby" Minimalist Baby Shower Party: Banner, diaper cake, and cupcake toppers.

Borrowing the same font from the invitation, the banner and gold hearts were a perfect match and just the right light minimalist touch to pull the details together. The gold hearts became the theme and common thread. It is especially fitting because the baby is due on none other than Valentine's Day! Seriously couldn't have done it without the Silhouette Cameo!

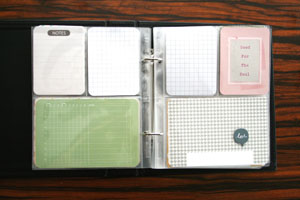
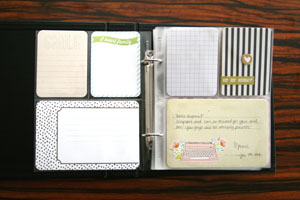
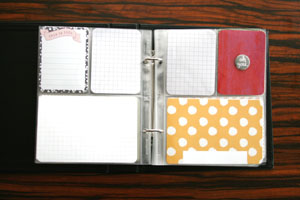
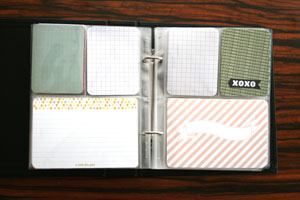
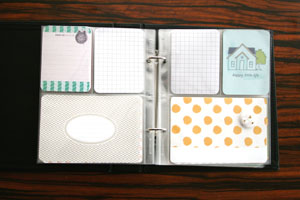
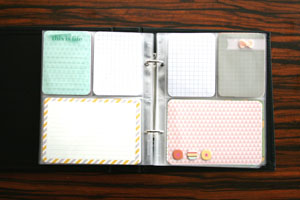
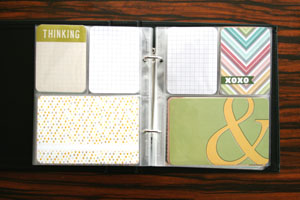
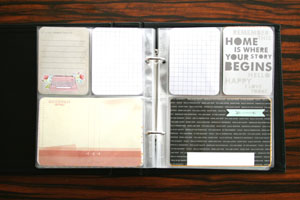
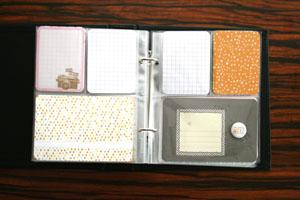
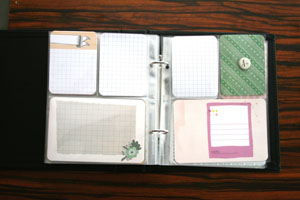
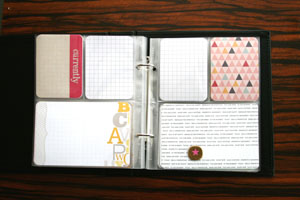
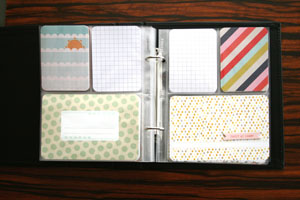
Of course, no baby shower is complete without a guestbook, or in this case a Project Life scrapbook. Didn't catch a photo of the final book, but here's a look at some of its foundation.

"Yay Baby" Minimalist Baby Shower Party: Guestbook Project Life scrapbook.

"Yay Baby" Minimalist Baby Shower Party: Guestbook Project Life scrapbook.

I had learned most people have trouble putting a scrapbook page together at a party or shower because the social setting isn't typically conducive to creative thinking. The end product is sometimes empty pages. So I tested out a simple formula at this shower and it turned out great. Each guest pulled out a single page protector once they settled in. Each page protector has 6 modules made up of 3 pockets x 2 pages (front and back). I walked around to chat with each brunch table to give some instructions. Each pocket played a part:

  • Front top left: With my favorite party tool, the Fujifilm Instax camera and film, we asked each guest to take a picture with the mama-to-be and slipped it in this pocket.
  • Front top right: Simple creative design with a sentiment, flair, chipboard sticker, or just the original Project Life card design.
  • Front bottom: We asked each guest to write a brief congratulatory message to the mama-to-be.
  • Back top left: We asked each guest to finish the sentence "my best parenting advice for mama-to-be is _______."
  • Back top right: We asked each guest to sign their name and date the card which happens to be the back of the card that the photo is adhered to.
  • Back bottom: We asked each guest to number the card 1 to 5 in list form. Then asked them 5 questions.
  1. Will the baby be born with hair or no hair?
  2. Will the baby be born with the mom's eyes or dad's eyes?
  3. Will the baby be born with the mom's nose or dad's nose?
  4. Will the baby be born with the mom's lips or dad's lips?
  5. Will the baby be born with the mom's ears or dad's ears?

It took some of the creativity out of the guest scrapbooking process, but it really helped everyone just enjoy their conversation, jot a few quick things down, and at the end of the event, we were able to deliver a complete scrapbook to our guest of honor.

I sure hope mama enjoyed being showered with all our love!

*Tangent: My father was a talented calligrapher and skilled craftsman who created signs for over 20 years. During my formative years, I spent summers watching him paint and make with his own two hands. Probably explains a lot about my hobby and my profession. :)

A Party to Celebrate 1 Whole Year (and 2,788* Diapers)

As a full-time working mom, it is always difficult to find time to be creative. It is a delicate balance between using the time to rejuvenate the body (also known as sleep) or the soul (also known as fulfilling my innate need to make something). When my daughter's first birthday came around, I wanted to make everything myself. But my reality just didn't allow me to and so I picked only the things I could manage and enlisted the help of other makers. Here's how it turned out!

"I Love You to the Moon and Back" First Birthday Space-Themed Party Dessert Display Table and Backdrop. Photo Credit: Morgan Bayard Photography

"I Love You to the Moon and Back" First Birthday Space-Themed Party Dessert Display Table and Backdrop. Photo Credit: Morgan Bayard Photography

My vision was a space-themed birthday party because we love my darling daughter to the moon and back. Even though I couldn't make everything for the party, I wanted to keep the spirit of crafting in all of the details. Things started coming together when I found much of the decor on Etsy. Here's a run down of everything from the party, just in case you're looking to create your own space-themed birthday party. It takes a small village to craft a party!

  • An Etsy seller, Kourtrivera, made the awesome ribbon banner and I added some gold foil strips to give it a metallic touch.

  • To create the feeling of vastness, I found a giant black foam core board at my local Artist Craftsman store and created the space backdrop. I altered outer space clipart I bought from an Etsy designer, DragonflyTwist, printed them and fussy cut each piece. I compiled the words "Happy Birthday Elizabeth" with holographic letters from Staples. They're the alphabet sets that are usually found in classroom bulletins. I then free-hand drew a chunky banner using a gold marker to give the appearance that the rocket ship is pulling the banner held by the astronaut.
  • Part of the birthday girl's gift was an astronaut backpack, Hello Kitty doll in a space suit, and a really amazing hand-painted astronaut doll from another awesome Etsy seller, LIllakopmis. She was kind enough to even customize the hair so that it resembled my daughter's. On the backpack, I adhered a serious space explorer iron-on patch from another great Etsy seller, MokuyobiThreads.
  • Inside of the backpack were some snack-size Miky Ways. In fact the dessert table displayed Starbursts, Moon Pies, Astro Popcorn in awesome baking cups from Etsy seller, InTheClear, and Astronaut Neopolitan ice cream. Each sweet was labeled! I printed names of food using 01 Digital font and stuck them to smaller pieces of black foam core board.
  • Paying attention to all of the details, I also printed space-related signs, using the same font, such as "Coloring Station" for a kiddy coloring area, "Orbital Nutrition Station" for the food buffet, "Fueling Station" for the drinks, "Waste Management" for garbage and restroom directions, "Odyssey Check-in" for the guestbook area, "Space suit Drop-off" for the coat rack, and "Wavelength Observatory" for the TV area.
  • The birthday cake and delicious mini cupcakes were baked by our favorite local bakery, DuJour. Inspired by my search on Google for a "moon-shaped cake", we designed a buttercream frosted half-moon cake with gray fondant craters and a light dusting of edible stardust. I also fussy-cut another astronaut clipart figure to top off the cake. On the cake is the perfect gold glittered beeswax candle from another amazing Etsy seller, NikkiCrafts. NikkiCrafts also supplied gold and silver glittered star cupcake toppers.
  • The chevron rose-gold sequin table runner is also from an Etsy seller, Jessmy. The option of rose-gold pulled in the pinks and peaches from the banner but also complimented the gold and metallics.
  • Details are key! In the background, we played all space, moon, planets, and star-related songs such as "Here Comes the Sun" by the Beatles and "Moonshine" by Bruno Mars. On the TV, we looped Amazon instant space-related episodes of Peg + Cat, Daniel Tiger, and Caillou.

To keep the kiddies busy, I found cardboard space ships! I assembled, painted, and colored in a Build A Dream Cosmic Cruiser and Alex Color A Rocket with the help of my husband. They turned out to be perfect toys and photo ops.

Instead of a traditional book, we asked guests to pose with a cardboard astronaut helmet prop, snap a photo with the Fujifilm Instax camera, and write a little note to the birthday girl.

To create a cardboard astronaut helmet, I painstakingly cut cardboard with super sharp and strong scissors and painted the helmet details using black paint and stuck it on popsicle stick.

Now, about the birthday girl's outfit... our little star wore a beautifully crafted pieces from Etsy sellers!

"I Love You to the Moon and Back" First Birthday Space-Themed Party Room and Cardboard Spaceships. Photo Credit: Morgan Bayard Photography

"I Love You to the Moon and Back" First Birthday Space-Themed Party Room and Cardboard Spaceships. Photo Credit: Morgan Bayard Photography

To give the venue a space museum look, I also adhered prints to black foam core boards and added a source label with the Etsy seller name and shop URL to the lower right corner of each board. The space-themed prints included:

Sprinkled on the tables were flowers from my local supermarket sitting in beautiful vintage ball jars from Etsy seller, TheCherryGrove. I actually had these left over from my wedding that I've kept in our apartment for years. They are the perfect go-to vases.

We really appreciated all of our family and friends who joined us in the celebrationLast but certainly not least, a huge thank you to my pal, Peggy, my husband, the grandmas, and our photographer, Morgan Bayard, for capturing all of the details and little moments of our day.

It was a beautiful day for my darling daughter and I look forward to her looking back at these photos and feeling our love!

P.S. Wow! *2,788 diapers as estimated by KidsGrowth.com. Now that's a reality check.