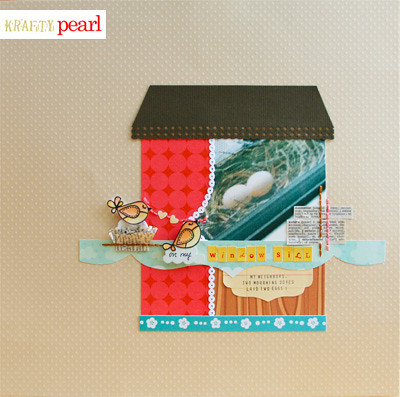
It all started one March morning with the mourning dove coo, the sound of fluttering wings and twigs banging on my window and I knew spring was near. And a few days later, on my window sill was a nest with two eggs! I spied on them like a National Geographic bird watcher, peeking at them every morning and night. One morning, mama mourning dove actually flew away from the nest momentarily and that's when I had the rare chance to sneak this photo of the eggs.
Inspired by a few challenges this weekend, I finally got around to scrapping about it:
Used: My Little Shoebox pattern papers, stamp, alpha stickers; Bazzill Basics cardstock; 2000 Plus custom stamp kit
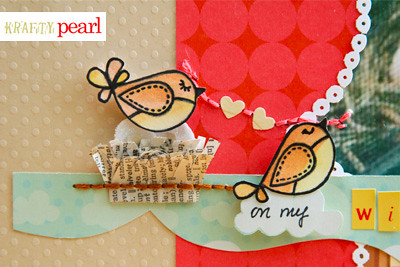
When I saw the My Little Shoebox March sketch challenge, I knew it was perfect to feature one of my rarest spring sightings as the story. The sketch works out perfectly with how the quadrants lend to the look of a window with curtains. The embellishment cluster in the sketch is also a perfect place for me to show a whimsical re-creation of the birds building their happy, loving nest. It reminds me of this one scene in Cinderella where two birdies help tie a bow in her hair.
I created the nest embellishment out of an old French-English dictionary page inspired by Cartwheels in My Mind weekend challenge where Cheryl challenged her readers to use a page torn from a book on at least 2 different projects in 2 ways. (My second project using a torn book page to come later this week, so stay tuned!) I then stitched the nest to the page with embroidery floss. I loved the way the nest turned out. Below's a little tutorial to make your own if you like it too! The eggs were hand cut to shape and dipped in glitter.
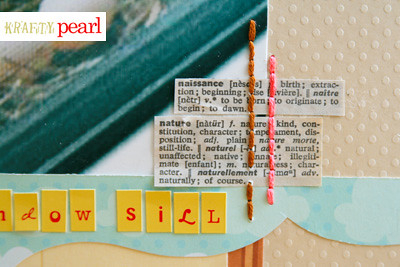
I also clipped out definitions for 'naissance' and 'nature' and hand-stitched it to the layout:
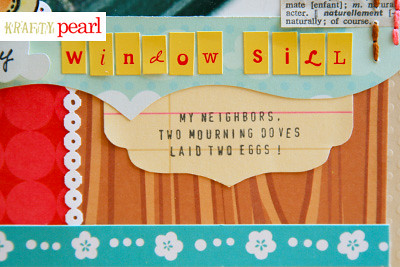
Between handwriting my journaling or stamping it, I definitely appreciated Nichol Magouirk's Two Peas in a Bucket April scrapbook stamping challenge to stamp it. Stamped journaling: "My neighbors, two mourning doves, laid two eggs!" I absolutely love this custom stamp kit from Staples that's perfect for stamping two sizes of journaling. The shape of the journaling area was hand-cut using Fiskars fingertip knife, using a remnant diecut sheet as the shape template. The curtain trimming was created by cutting this EK Success Parisian border punch. Also used the same punch for the roof.
And to wrap up this post, I have a very simple tutorial to making your own nest embellishment!
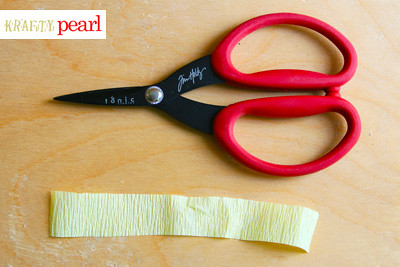
Step 1, all you need is a sharp pair of craft scissors and a strip of paper you want to use to make your nest. (The longer your strip, the fuller the nest.)
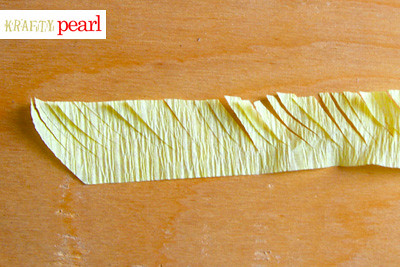
Step 2, take the strip and snip off the opposing corners and make diagonal cuts along the top side of the strip leaving the paper intact to the bottom:
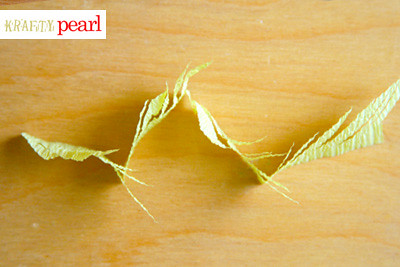
Step 3, fold the strip into a zig zag pattern like so:
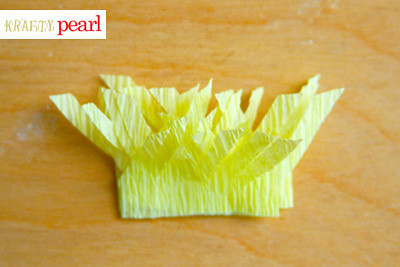
And voila! You've got your self a nice nest embellishment:
So whaddaya think? I hope you like!
Until the next post!
- KRAFTY pearl


